A Simple Guide to Making Your Car Headlights Look New Again
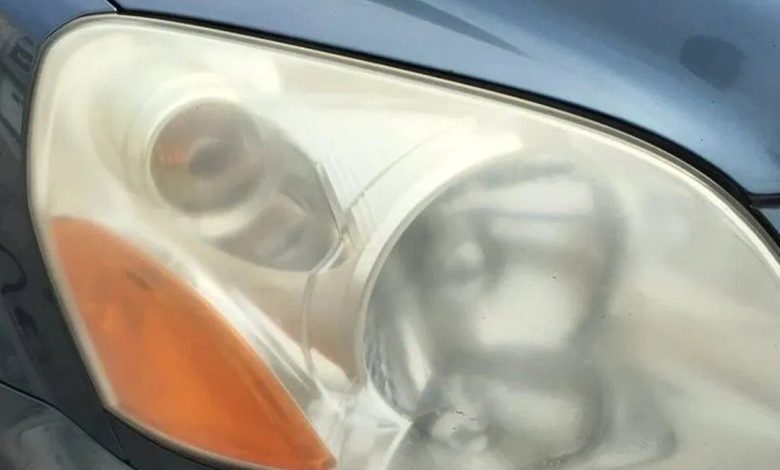
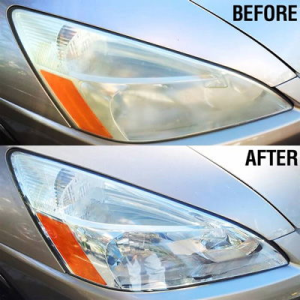
Over time, the plastic covers on your car’s headlights can lose their shine and become cloudy, yellowed, or even damaged. This can make your car look older than it is and, more importantly, reduce how well you can see the road at night. Many people think that fixing this problem means spending a lot of money to replace the entire headlight unit. However, you might be surprised to learn that you can often bring your headlights back to their original clarity yourself, in about 45 minutes, for a cost of around $15. This process involves carefully cleaning and polishing the plastic surface to remove the hazy layer.
What You Will Need:
To get started, you will need to gather a few simple tools and materials:
- A soft “flannel polishing cloth” for applying and buffing the polish.
- A pair of “latex gloves” to protect your hands during the cleaning and sanding process.
- “Masking tape” to protect the paint around your headlights from accidental scratches.
- A set of “wet & dry sandpaper (1000 to 2500 grit)”. You’ll start with a coarser grit and move to finer ones to smooth the plastic.
- A good quality “plastic polish” specifically designed for automotive headlights.
Step-by-Step Instructions:
Follow these steps carefully to restore your car’s headlights:
Step 1: Thorough Cleaning and Initial Sanding (Moving Horizontally)
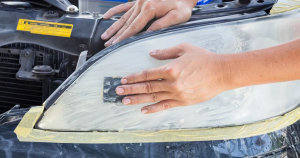
First, it’s important to “Clean the hazy headlight with warm soapy water.” This will remove any dirt, grime, or loose debris from the surface. Make sure to “Rinse thoroughly with clear water and let dry.” Once the headlight is completely dry, take your “masking tape” and carefully apply it to the paint surrounding the headlight lens. This will prevent the sandpaper from accidentally scratching your car’s finish.
Next, prepare your sandpaper. It’s crucial to “Soak the sheets of sandpaper in water” for a few minutes before using them. This helps to lubricate the sandpaper and prevents it from clogging with plastic dust. Begin with the 1000-grit sandpaper (or a slightly coarser grit if your headlights are very heavily hazed). Remember to “Sand moves in one direction.” Work in even, horizontal strokes across the entire surface of the headlight lens. Apply gentle, consistent pressure. You will notice the water turning cloudy as you sand away the damaged layer of plastic.
Step 2: Progressive Sanding (Changing Direction)
After you’ve sanded the entire lens horizontally with the first grit, “Rinse” the lens with clean water to remove the plastic residue. Now, switch to the next finer grit of sandpaper (for example, 1500 grit). This time, “change direction” and sand vertically across the lens. Again, keep the sandpaper wet and use even strokes. “Keep doing this until you’re finished with the 2,500-grit paper.” With each progressively finer grit, you will notice the scratches from the previous grit becoming less visible, and the lens will start to look smoother. Remember to rinse the lens thoroughly with water after each sanding step.
Step 3: Applying and Buffing the Polish
Once you have finished sanding with the 2500-grit paper, “Wash the headlamp well with clear, cool water, then dry it.” Make sure it is completely dry before moving on to the polishing stage. Take your “flannel cloth” and “Wet one corner… with polishing compound.” Apply a small amount of the “plastic polish” to the damp corner of the cloth. Now, “Use forceful pressure to polish the headlamp in a circular pattern until it is smooth and clean.” Work the polish into the entire surface of the lens. You will likely see the lens becoming clearer as you polish.
Step 4: Final Polish and Inspection
After applying the polish, “Allow the polish to dry completely before buffing away any remaining polish with the clean end of the cloth.” Use a clean, dry part of your flannel cloth to buff the lens in circular motions until all the polish residue is gone and the lens looks clear and shiny.
For headlights with more significant damage, you might need to “Repeat the polishing process.” It’s also possible that “Depending on the extent of the headlamp’s damage, small portions may remain cloudy.” If this happens, “Try repolishing only those areas with a polishing product.” Focus your efforts on those specific spots. After repolishing, “Buff the area again and inspect.” The goal is for “The lens should appear completely clear!”
By following these steps, you can often save a significant amount of money and restore the clarity of your car’s headlights, improving both the appearance of your vehicle and your visibility on the road.